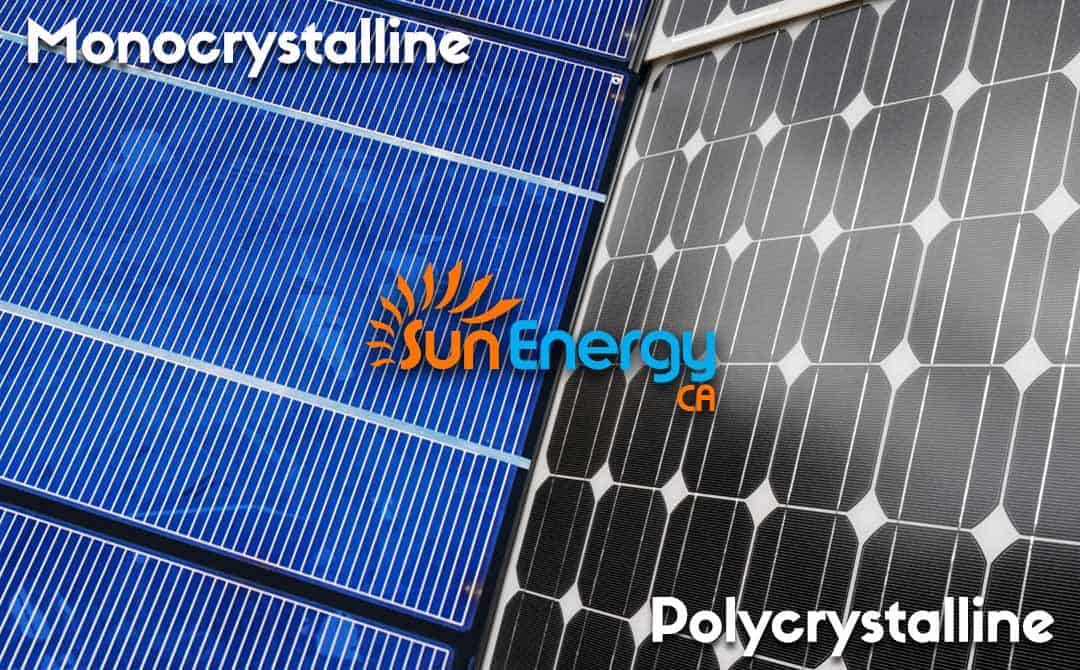
Have you ever wondered how solar energy can be so efficient while also becoming increasingly more affordable? To answer this question successfully, we must understand how solar energy works. The most standard types of solar panels are monocrystalline and polycrystalline.
A long time ago silicon solar panels were super expensive because they could only use extremely high-quality silicon during the manufacturing process. And at this time, the purification procedure of the silicon entailed a lot of time and money, too.
Now, the development of new technologies has allowed us to utilize cheaper and lower-quality silicon with the same desired results. Because of this, along with government subsidies for solar energy, solar panels have become more affordable leading to photovoltaics gaining in popularity.
How Solar Panels are Made – Step by Step
The most common materials used in making solar panels are mono and polycrystalline silicon (c-Si) and amorphous silicon (a-Si). Therefore, the cell structure is different and each one requires differing materials in their production, however, for monocrystalline and polycrystalline panels, the manufacturing process is similar.
STEP 1: Sand (the raw form of silicon)
Silicon is the most common component used in solar panels and is also the 2nd most abundant mineral on earth coming in hot right behind oxygen. They also use silicon in computer chips. Silicon is a nonmetal that has a lot of conductive properties and because of this, silicon can convert light from the sun into electricity. When light hits the silicon, the electrons in it start dancing (metaphorically, if you will) and this process is called the “photovoltaic effect.” The photovoltaic effect is the action that produces electricity itself. To turn sand into silicon requires extremely high-temperature heat provided in an arc furnace.
STEP 2: Block of silicon
Once the silicon is in rock form, they melt together hundreds of them at ridiculously high temperatures to form big blocks (sometimes called ingots) and they are either in the shape of a big cube or cylindrical, depending on the shape of the furnace that is used. During this process, they add boron which makes the silicon more conductive.

STEP 3: Wafers
Now, you can’t very well expect your roof to support a giant block of silicon crystal for an extended length of time, so this is the step in which the ingot is sliced by a wire saw. Once the silicon is sliced into thin disks, they are then referred to as wafers. This is also the part where they slap some reflective coating on those bad boys. They do this because silicon is naturally reflective and the last thing we want our solar panels to do is to reflect light. We want them to absorb and convert.
STEP 4: Solar Cells
Now it’s time to convert those wafers into the things we all know and love! During this process, they apply metal conductors to each surface of each wafer. These metal conductors are what give solar panels the grid look to them. These grid-matrix patterns are what allow for the conversion of solar energy into electricity. Once these conductors are applied, they are baked in an oven while the phosphorus is dispersed in a thin layer of the wafers, charging them with a negative electrical charge.
STEP 5: Solar panel time!
Once the solar cells are integrated, you have a solar panel. They then apply a glass protective layer on the front and a highly-durable, polymer-based material on the back along with a metal (most of the time, aluminum) frame. The final step is applying the junction box to allow for the necessary connectivity.
The most common solar panels you see on the market are the residential solar panels (48 cells), the standard size solar panels (60 cells), and the big ol’ solar panels that are usually used for large scale installations (72 cells).
STEP 6: Testing
No product is ready for the marketplace without proper testing. Once the panels are ready, they need to be tested to ensure they are doing what intended. They typically use STC (Standard Testing Conditions) and NOCT (Nominal Operating Cell Temperature) for reference while at the manufacturing facility. During this process, they put the panel in a flash tester to test the wattage and resistance to heat and wind. These parameters for both tests are written down and you can find them in the technical specs sheet on every single panel. These sheets detail the temperature and impact tolerance, along with current, power output, efficiency, and voltage. They are then cleaned, inspected, and shipped out for homes and businesses to use.
How Do They Make Amorphous Silicon?
Amorphous silicon cells are what make them flexible, thin-film, solar panels. These are non-crystalline and are typically attached to a layer of glass, plastic, or metal. This is what makes them skinny and bendable, unlike the crystalline panels discussed previously. Most people use them because of their mobility and versatility. It’s pretty common for people to use them when traveling for basic power necessity, as their electric output is nowhere near to that of what you achieve when using mono or polycrystalline cells.
To make these, they use a process called monolithic integration. This is a built-in connection of individual solar cells and it eliminates the need for the expensive labor of a manual connection that is used by crystalline silicon. It also increases durability.
Advantages of Amorphous Silicon
Along with being durable and versatile, amorphous silicon can also be produced in different shapes and sizes, making it perfect to use for technology such as solar calculators, landscape lighting, watches, and even car accessories. They’ve been using this silicon in calculators for many years (not quite as far back as the knights and maidens in the days of yore, but close).
Also, it should be mentioned, because of their flexible nature, this makes them much less susceptible to breakage during transport or installation.
The final advantage of amorphous silicon is its cost. Because of the lower manufacturing costs, it’s priced super competitively on the marketplace. Now, while this all may sound grand, you should know the disadvantages of amorphous silicon, too.

Disadvantages of Amorphous Silicon
As mentioned earlier, amorphous silicon generates less energy than mono and polycrystalline solar cells, and most of the attempts to make these cells more efficient have resulted in a more complex production process, making the costs of manufacturing it more expensive resulting in a less competitive product.
Another disadvantage of amorphous silicon is its life expectancy. While it may have a 25-year life expectancy, their performance doesn’t maintain as well as the crystalline cells.
Why Go Solar?
For most people, investing in solar energy makes a lot of sense when considering that the system pays for itself over time and is good for the environment. Getting solar panels for your residence is one of the smartest decisions a homeowner can make. If you’re having trouble deciding on whether or not to go solar, we are here to provide you with the information you need to make the switch. Contact Us or reach out to one of our solar advisors at 760.545.8466 for a free, no-pressure consultation and estimate. You’ve heard the bad, we’ve got the truth!

